Tuesday, April 9, 2013

white washing

I wrote previously about some small decorating updates I had done to our bedroom, here:
A prettier place to sleep


But it's time for more. Our bedroom is the half second floor "bungalow" portion of the house. I've spent the past four months staring at the wood paneled walls and wondering what I wanted to do with it. On the expensive and huge project end of things, we could rip out the paneling and replace it with dry wall. The nice part about this option is we could add in better insulation up there, and it would look completely updated. However, that is not at all in the budget right now.

On the super cheap and no project end of things, the wood paneling could stay as is. It's actually grown on me a lot more than I thought it would. When we first moved in, I hated it! Now I think that it's cozy, and gives the room a different feel than the rest of house.


Close to the "cheap" option, but involving a bit of a project, is another idea I've been toying with: white washing the walls. The walls are real wood, grooved paneling, not the gross particle board stuff, so they would actually absorb the white wash and make our bungalow into a beachy, cottagey retreat. Or at least that's what I'm hoping! haha

Here are my inspirations:


Source: houzz.com via Jessica on Pinterest


I actually tried it out in my closet, so that if I hated it, it wouldn't be visible, and guess what? I didn't hate it! It was also pretty easy: equal parts water and white paint mixed together and brushed on. Next to approve? Will! He liked it too, which I was surprised about because he liked the wood paneling from the very beginning. So maybe in the next few weeks I will get this project started!

Wednesday, March 20, 2013

spring! (sort of)

This week I've had many discussions with first graders about how even though the calendar sometimes says "spring", it might not feel like it. And the temperatures this week definitely do not feel like it! Even so, my decorating thoughts are moving outside. I can't wait to plant flowers, work on putting a patio in the back yard, and work on the outside painting projects I've been waiting on. This past weekend I took on one of those outside projects, re-doing our house address numbers and mail box.

The numbers before were so, so ugly. Ripping them off was so satisfying! I've been driving up and admiring the new porch view all week :-)

We bought a new porch light which is close to the same finish as the color that I sprayed the mail box and address plate, and our electrician is coming out this weekend to install it. I can't wait to be able to turn on the porch light in the evenings! Once it gets warm out, I want to spray the silver aluminum storm  door the same color as the mail box and address plate.


In other house news, I painted one of the main floor bedrooms which is going to be our office. It's a charcoal grey color with lots of green undertones and it looks amazing with the white trim, the thick ceiling border along the top, and the floors. This room on pinterest was the inspiration: Benjamin Moore Revere Pewter color matched into Olympic non-VOC.


I loooove the old door knobs! I'll need to take a close up picture of them soon because they are just lovely. They are original to the house and they add so much character.We've yet to move in any furniture into the office, but it will be so nice to have another functioning space on the first floor.

Only one more room to paint on the first floor, the guest room/future baby room! I already have a paint sample up on the wall and I'm hoping to get it done soon.

Saturday, February 16, 2013

back to painting

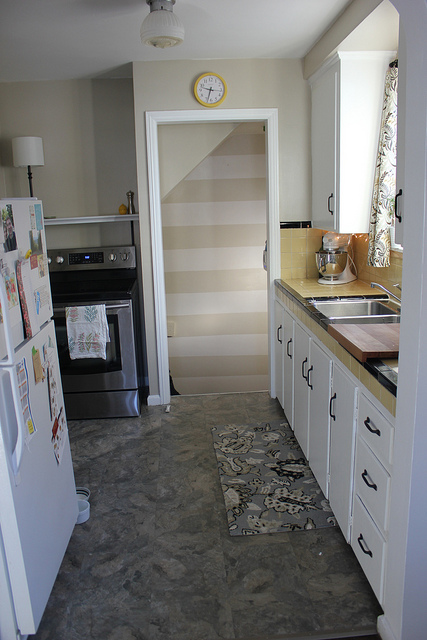
I can't believe that I haven't had a paintbrush in my hand for weeks now! When we first moved in, I was constantly painting. Today I pulled my painting clothes out, and I finally finished up the bathroom (for now at least), which I've been working on in one way or another since early December! I painted it a few weeks after we moved in, but I've been in the process of painting the door and trim since then. As in, the door knob and trim have been taped off for two months, and I've been putting it off.

But now it's done! There is no house project more satisfying than taking dingy, yellowed trim, and painting it fresh, bright white! I painted the door (both sides), the trim around the door on the bathroom side, and started painting the trim in the hallway too. It's actually the first trim to be painted in the entire house. It's so nice to see how the wall colors look against freshly painted trim! Onto the bathroom....


Here is the bathroom when we first bought the house:


And here is the bathroom now:


There is still a lot I want to do, but here's what has been done so far....

We got a new faucet. The sink is original to the house, and I love it! It's in great shape too, considering it's been washing hands and faces since the 1940's!. The faucet that was in when we moved was probably from the 80's or 90's. It was ugly, dirty beyond a hope of actually getting it totally clean, and in rough shape. Our new faucet looks beautiful with the vintage sink.


Like I mentioned, I painted the bathroom back in early December. I chose a dark greyish brown from a color I picked out of the shower curtain.


 The shower curtain was actually the first thing I purchased for the house, a few weeks before we even closed! I had read a lot of recommendations in various blogs about decorating a bathroom with 1940's tile, and many of the suggestions were to go as neutral as possible with everything. Like, white shower curtain and everything else. This shower curtain obviously goes against those recommendations, but I think it is pretty, and the colors seem to ever so slightly update the bathroom.

 As I mentioned, here is the freshly painted door. I'm in love with the original 1940's doorknobs in the house, and they look even better now that the door is cleaned up.


In the short term, there is definitely more I want to do. We are in desperate need of a new light fixture and mirror. The exposed bulbs that are in there now are just awful. I can tell there used to be another piece to the fixture, and I'm really curious what it looked like.


I found this light fixture that I really like...
found here


And I really like this mirror, with a shelf on the bottom.
found here


We also really need a curtain or shade in here! We've been getting by with a white pillowcase hanging over the top portion of the window, so that definitely needs to change. I keep going back and forth with what I would like to have though (a cloth curtain, some sort of textured wooden or woven shade, a white wooden shade, something else?!??), hence the extended use of the pillowcase.

Another plan for the bathroom is to add a shelf above the door so that we have a place to store towels, and I'd like to also figure out a way to conceal the pipes under the sink.

More long term, I'd like to put down new tile floors, and potentially have the tiles reglazed as a way to save money on a huge tear out of the current tiles, which are in great shape. If we do that, I would really like to have the orange-y tiles re-glazed white, and leave the black accents along the top, bottom, and the narrow decorative strip in their original color.
This is kind of my inspiration with the tile color:

I love the floors in this bathroom, and how they added beadboard to the front of the tub:
found here

Overall, no matter what we do, I want the bathroom to look like it makes sense in the house. I want to update it, but I also don't want a trendy 2013 bathroom in our 1940's house, especially in the big investments like new tile flooring. It will probably still be a while before this all happens, but it's really exciting to start thinking about!!

Sunday, February 10, 2013

ektorp corner couch

After lots of internet researching, yesterday Will and I ventured to Ikea and bought a couch! We've been using my college futon as a couch since we moved in, and while I was grateful to have it for the past few months, it definitely gave the living room a college apartment feel. Our super comfy but kind of in-rough shape couch didn't fit in the front door, so it lives in our basement now.


That whole not fitting in the door thing is one of the reasons we went with an Ikea couch. When you walk in the front door, you have to immediately turn to enter the living room, and to bring something in the side door, you also have to go around a turn. That makes getting anything large into the house a big challenge. An Ikea couch, which comes in pieces, solved that problem! The boxes the couch came in were so enormous though, that we decided to pay a little extra to have them delivered. I had read this recommendation on a blog, and I'm so glad that I did! They were able to deliver it the same day, so not too much waiting either.

 When we unpacked the cushions, our entire house was filled!


I was definitely a little anxious about the putting it together process, but we were both pleasantly surprised with how simple it was. The whole couch was together in less than an hour, and that included vacuuming the floor where the couch was going to land, and rearranging the existing furniture (the futon lives in the "guest bedroom"/future baby room for now). So after the work was done, we had a real, grown up living room! No more college apartment furniture!


Up next? A new solution for the entertainment area and tv. Yikes, it's a mess!


I picked out, and Will bought us these beautiful pillows from Pier One today! The big grey and white pillow are from Ikea and are sooo comfy to lay against.
This is the view from the dining room. I'm dreaming about extending this doorway all the way to the wall on the right so the dining room and living room would be more connected.


So if you are looking for me anytime soon, you'll probably find me near this couch :-)

Saturday, February 9, 2013

kitchen update

Of all the rooms in our house, the kitchen has definitely gotten the most attention. I spent weeks working on it before we moved in, knowing that I would not be happy here until it was clean and fresh. We have dreams of totally renovating it down the line, but for now, I am happy with it. My few gripes are the lack of counter space makes cooking difficult, and the lack of a dishwasher is a HUGE adjustment. However, the yellow and black tile has actually kind of grown on me!

Here are some updates I've made to the kitchen recently:

  • Added black metal brackets to the shelf above the stove. The brackets made the floating white shelf a lot more stable, and it also helped tie it in with the cabinet hardware. 
  • Since the shelf is more stable, I was able to add a lamp. I love not having to turn overhead lighting on, so this is nice to have when I'm cooking dinner. Looking at the pictures of it, I would like to run the cord from the lamp along the bracket to make it less visible, and then secure it along the wall behind the stove so it's not so messy looking. Because the sink full of dishes that's there 90% of the time is messy enough haha 
  • On Friday I actually had a snow day (yeahhhh!!), and I made kitchen curtains. My mom helped me pick out the fabric, which works perfectly with the colors in there right now, and I used iron on seam tape to finish it off. It was nice to be able to choose whatever fabric I wanted, and customize it to the non-standard size of this window. It's so nice to have for privacy at night, and it really makes the area look finished. I have seen this project done on lots of blogs, but was still a little intimidated by it. It was soo easy though! I definitely plan on making more curtains.
  • I got a rug from Target (on sale!) that I put in front of the sink. I might move it in front of the stove to spread out the pattern across the room, now that I'm looking at it in pictures.


Other exciting house news is that we bought a new couch today!! I'm laying on it right now :-) Pictures tomorrow!

Monday, January 28, 2013

snow day scrubbing

Today is a snow/ice day for me, so a rare Monday morning post about a little project from this morning is in order!! As much as I dream about big projects that I want to do on the house, like finishing the basement and renovating the entire kitchen,  little projects that focus on one tiny element and are actually do-able right now are much more satisfying.

Last night I saw an article about how to clean marble, specifically a small area of marble under a door. We just so happen to have a piece of marble under our bathroom door that separates the bathroom tile from the hard wood in the hall. I had noticed how dingy and not-at-all pretty it was, but had put little to no thought into doing anything about it. Our marble is nowhere near as pretty as the type pictured in the article, but when I saw the article, all of a sudden a light bulb went off. Maybe our marble is just dirty! I pinned the article knowing I wanted to try it out one day and see.


Fast forward to 5:30 this morning, when a text came in from our school closing system telling me that my district was closed. Yayyyyy! I went back to sleep for 2 hours, sat in front of the news for an hour with coffee, and then I knew just what I wanted to do: clean the marble piece in the bathroom! And so I did.


I followed the method in the article very roughly. First I razored off a few paint spatters that were on it from painting the hall. Next I scrubbed it with a mixture of Bon Ami cleanser and hydrogen peroxide, using a scrubby sponge. After that, I used sand paper and a ton of elbow grease to sand the entire thing, using hydrogen peroxide to get it wet while I sanded. I also cut out the old caulk around the edge and put in a new strip on each side.
The only bummer of the whole project is I didn't get a great "before" picture to show just how dingy it was when I started. The picture above is "in process", and it's covered in cleanser.

Add caption

Here's a close up of how it looked after I had scrubbed it with the cleanser, hydrogen peroxide, and scrubby sponge. A lot better already, but still really grey and dingy. See the spot labeled "original color"? For some reason, that small spot was the original bright white, and that gave me a goal to keep scrubbing for!

I was using my phone to take pictures, so the difference is much more subtle in picture than it was in person, but you can see the gradual change that happened as I started sanding it. 


During the entire process, it went from beige (before any work), to grey (after scrubbing with cleanser), to white (after sanding)!

 
I keep walking into the hallway just to look at my "new" white door step. Next up? Painting the trim and bathroom door bright white.

Sunday, January 27, 2013

a prettier place to sleep


Last time I posted, I was sitting upstairs listening to the noise of a drain guy clearing out backed up drains, a job that should have taken care of the problem for the next 70 years, like it had for the past 70. Well, it didn't. Last night I was giving Abby a bath and the basement started filling with water again, this time coming up from all three drains. So exactly two weeks later, the drain guys are coming again. And he said on the phone last night that if this is happening again, the issue is likely something bigger than what he did last time. Uggghhh.


So maybe in an attempt to distract myself from that, this post from here on out will have nothing to do with drains or the stinky basement. Instead, our bedroom, a space that has been pretty neglected since we moved in.
-----
It's been driving me a little crazy. It was one of the rooms that didn't need to be painted, because the walls are wood paneling that everyone tells me are high quality and expensive. Also, the wood floors were in good enough shape that we didn't refinish them, so the room has been pretty close to it's original form since we moved in. The only thing that has changed is the ceiling, which we had drywalled to replace very dated ceiling tiles per the cities requirements.


this is the end of the room where you enter when you go up the stairs. I imagine a little sitting area here eventually
here is the main bedroom area, as it was before I got started
another view of the main area of the bedroom, before I started working on it


I think that the lack of decorating or personalization leads us both to not put a lot of effort into keeping it tidy. We have had clothes everywhere and messy bedside tables since we moved in. We are putting our money into paying for the wedding and paying off the windows and appliances, so the decorating money is very limited at the moment. I started by picking up all the laundry and sweeping the floor.  Then I decided to pull together items from around the house and boxes that still haven't been unpacked to make the bedroom a little less boring and a little more us. For about 30 minutes of work and $0 spent, I think it came together beautifully!
some of the items I picked up from around the house


Here it is now:


I used some frames we already had, but replaced the pictures with pieces of fabric that were left over from a bench project


These floating shelves, mirror, and 'Love' print all lived in our apartment, and fit just perfectly in an arrangement on this short wall. The green ceramic tree plaque was also in our apartment, in the kitchen. I got it from a garage sale years ago for less than a dollar.

.


 Can you tell that I like  blue-ish greens, nature inspired art, and birds? It was actually really easy to pull things together because so much of what I have works within those themes. I also went through the books and only chose to leave some on these visible shelves.


The Michigan print resting on the top shelf is from a shop on Mackinaw Island, where I went on vacation last summer. On the bottom shelf is a pretty glass hour glass that was a house warming gift from my friend Kelsey, and a sweet bird that used to live in our apartment bathroom.


The bedroom is definitely not done by any means. I'd like to add a big rug under the bed, put up curtains, add a sitting area, get a colorful duvet cover, paint our bedside tables, put up new light fixtures (instead of an exposed bulb!), and figure out a better way to use the built in book shelves. I'd even like to change out those frames above the bed for white frames that are a bit larger. For now though, it will be much easier to convince myself to get into bed earlier knowing that I have this much improved space waiting for me!